Sunday, April 17, 2022

Solo Quest: "Return to Dark Tower"

In previous posts, I've talked at length about how I "outgrew" the board gaming hobby in the late 80's / early 90's, thereby missing out on some amazing fantasy-themed titles like DungeonQuest, HeroQuest, and Wiz-War. But how in Bahamut's name did the original Dark Tower pass me by? 

I think it just comes down to timing. I was only 11 years old when the game was released in 1981, and Star Wars was still the alpha and omega of my imagination. In fact, if you were to show me the following two-page spread in a catalog back then, the only thing I would have noticed is the stuff on the left hand side.


Image source: http://jimsmash.blogspot.com/2012/12/christmas-catalogs-1981-1982.html

It would be another two or three years before the Mentzer D&D Basic Set would detonate a second forty-megaton nuclear warhead in my imagination and lure me into the realm of fantasy for the first time.

Ergo, by the time I was predisposed to something like Dark Tower, it was likely already out of production and / or I was spending every cent I had on AD&D hardbacks. 

Enter Restoration Games, who've built an entire business model on delivering organic, farm-to-gaming-table 'Memberberries. They gave us a re-vamped Star Wars: Epic Duels in the form of Unmatched and roped in a massive group of nostalgic gamers via their faithful reprint of Fireball Island.  

But sequel-cum-remake to Dark Tower, logical titled Return to Dark Tower, represents their most ambitious project to date. 


Here's the elevator pitch for this one:

Long ago, the sorcerer-king Azkol built a Tower at the crossroads of the Four Kingdoms. Behind its ebon walls, he practiced dark sorcery in his search for power. 

As Azkol’s madness grew, his apprentice, the sorceress Nimet, plotted against him. She stole his wondrous treasures and fled the Tower, then recruited heroes from the Four Kingdoms to stop him. One hero prevailed. Azkol was defeated, and the Tower lay vacant.

But now a new adversary has taken up residence. It grows in power, spreading corruption and calling forth wicked creatures from afar. This foe cannot be defeated alone. The heroes of the Four Kingdoms must unite and return to the Tower.

***

Return to Dark Tower is a cooperative game where heroes of the Four Kingdoms join forces, with the aid of a helpful companion, to defeat the adversary in the Tower. You all win or lose together. 

Your companion will guide you in your quest to breach the Tower and engage the adversary in battle. But beware! The Tower’s influence is ever working to corrupt the heroes. 

You have six months before the Four Kingdoms fall and the adversary’s reign is absolute. Can you repel the gathering darkness?

Still questing to breach the bleak walls of ignorance? Then click on the following magical link to glean all of the eldritch secrets in the form of yon rulebook. 

*** 

Recover Azkol’s Treasures and Defeat Ashstrider

Solo Play-through as the Relic Hunter

Month 1

Turn 1

Start of Turn: I use my Banner Action to gain a "Golden Sun" Potion. 

Middle of Turn: I Move 2 spaces to Dayside and take a Heroic Action to Cleanse the Bazaar there and remove 2 Skulls. I then Reinforce, paying only 1 Spirit (thanks to my "Prepared" Virtue) to buy the "Golden Mace of Azkol." My Spirit count started at 1 then + 2 for the Heroic Action = 3 but then - 1 to buy the Treasure, so I'm currently at 2.

When the Skull is dropped, the Tower tells me to add a River of Fire to the board, so I place it between the East and South borders! 

MONTH 2

Turn 2

New quests added to the board! Companion Quest: Miras appears in The Emerald Expanse. Adversary Quest: venture to the Upper Ice Fangs to prevent more rivers from catching aflame! 

Start of Turn: I use my Banner ability to gain a Potion and spend the "Golden Sun" elixir to gain a Spirit, bringing me back up to 3. 

Middle of Turn: I travel to the Upper Ice Fangs, remove 3 Spirit (reducing me to 0) and successfully Quest there to prevent any more fiery rivers from being placed. This Heroic Action gets me 2 Spirit back. I then take a free Sanctuary Reinforce Action to get a single Spirit, so now I'm back up to 3. 

In the subsequent Skull drop, it rolls out into the South Kingdom and I place it on the Citadel there. A Seal is removed on the Tower’s West side, revealing an anti-Quest Glyph there. Zaida’s ability kicks in, letting me draw a random card from the Treasure Deck. I get the "Axe of Soul Rending" and add it to my tableau. Then all of the Treasure Cards are put at the bottom of the deck and 3 new options are revealed. 

Turn 3

Start of Turn: I use my Banner ability  to pick up a "Golden Sun" Potion, which I  immediately drink to get back up to 4 Spirit. 

Middle of Turn: I Move 3 spaces to get to the Plains of Plovo and do a Cleanse Action there to remove the Skulls and gain 2 Spirit. I'm now back up to 6! I then spend 1 Spirit to Reinforce the Bazaar and gain the "Crown of Azkol"! 

After I slam-dunk a Skull in the Tower, rumors begin to swirl that a gout of flame from the Tower will soon rain down on a Citadel! Then the Brigands on the board lash out! Normally, I’d lose an Item, but since no Brigands are near me I dodge this theft! Finally, a Frost Troll appears in the Big Sister space to the East!

Turn 4

Start of Turn: my Banner ability lets me draws a "Siren's Song" Potion for free.  

Middle of Turn: I spend 1 Spirit to move up to 6 spaces, putting my Spirit count down to 4. Upon arrival, I perform a Quest Action, using Zaida's special ability to spend the "Axe of Soul Rending" to generate 3 Wild Advantages. I then use these Wilds in place of the 3 Stealth required to complete the Quest and gain another companion: Miras! This Heroic Action gives me 2 Spirit, so I'm back up to 6. Finally, I spend 1 Spirit, taking me down to 5, and buy the "Lamp of Hope" via a Reinforce Action at the Bazaar there.  

Skull drop...a Seal is removed on the South side of the Tower, revealing an empty space. 

Turn 5

Start of Turn: I gain a free "Purifying Breath" Potion as part of my Banner Action.  

Middle of Turn: I use my "Siren's Song" Potion to move a Troll to the Hissing Groves and then spend a Spirit to boost my Movement to travel onto that space. I still have 2 moves left and 4 Spirit. I Battle the Frost Troll there with 2 Humanoid and 1 Wild Advantage. Fortunately, I defeat the Troll without using the Wild. After collecting 2 Spirit for this Heroic Action, I then spends 5 at the Citadel to unlock the “Crafty” virtue. I then use my remaining 2 Moves to enter Tower Scar Desert!  

Skull drop: Miras misleads the Trolls, luring the remaining one from the Big Sister 2 spaces into the Decaying Wilds!

Turn 6

Start of Turn: I gain, and then immediately spend, a "Purifying Breath" Potion, which lets me remotely remove 3 Skulls (+2 due to "Crafty"!) from the village in Anza!  

Middle of Turn: I then journey 3 spaces into the Decaying Wilds Grasslands region and Battle the Troll there. Going into this I have +2 Humanoid Advantages, +2 Wild Advantages in the Grasslands (thanks to Miras!) as well as a "Fortunes Favor" Potion. The fight is pretty brutal and I'm forced to spend all of these Advantages, including the Potion, which is doubled to 2 Wilds thanks to me being "Crafty"! I then recruit 6 Warriors for ending my turn on a Grasslands space, again courtesy of Miras! 

I can't Reinforce 'cuz I'm not on a Building space, so I just drop a Skull. With a mighty roar, the Tower signals that a Troll appears in the Irontops to the South.

Turn 7

Start of Turn: I draw a "Thousand Strides" Potion with my Banner Action and then spend it to move to the Three Rivers

Middle of Turn: I then perform a Cleanse, using the "Lamp of Hope" to remove 3 Skullerydoos from Duwani Village. After gaining 2 Spirit, I spend 1 to gain "Kameria’s Carpet" and then use my remaining move to get to Duwani Village. 

Skull drop! It rolls out into the North, so I place it on Egan’s End Village. Two Skulls also pop out in the South, which I place on the Sanctuary in the Sands of Madness. Then a giant fireball strikes the Citadel in my current Kingdom, I.E the Inner Kinghills. The Brigands also increase in power, unlocking "Savage" mode! Yikes!

Turn 8

Start of Turn: I gain another "Thousand Strides" Potion and spend it to generate up to 6 movement since it's doubled by "Crafty"! I then move 4 to get to Egan's End.

Middle of Turn: I perform a Cleanse Action to remove the 3 Skulls from there. This gets me 2 Spirit, one of which I spend to recruit 12 Warriors! 

On the subsequent Skull drop, nothing happens and the Month ends!

New quests: Smuggler’s Coin in the Three Rivers and Arsonists threaten the Emerald Expanse down South!

MONTH 3 

Turn 9

Start of Turn: I draw a free "Fortune’s Favor" Potion.

Middle of Turn: I spend 1 Spirit to gain 12 more Warriors! I then play my "Thousand Strides" Potion to move up to 6, which is exactly what I need to reach the Three Rivers. I then spend 18 Warriors to complete this Quest, gaining 2 Spirit for this Heroic Action. Then I move 3 spaces to the Southern Wastes! 

Skull drop: 1 rolls out into the East, which I place in the Three Rivers Bazaar. 

Turn 10

Start of Turn: I draw a random "Golden Sun" Potion. 

Middle of Turn: I spend a Spirit to gain 12 Warriors in the Southern Wastes Village and I also have a supply of  6 Spirit. I then Move 2 spaces to reach the Emerald Expanse. The resulting Quest Heroic Action gains me 2 Spirit back! 

A Skull tumbles out into the South, which I add to the Howling Desert Citadel. The Tower rotates, the power of the Frost Trolls increases and Brigands also appear up in Greenbridge!

Turn 11

Start of Turn: After drawing a free Potion for my Banner Action, I use a "Purifying Breath" to remove up to 2 Skulls from any Building, which is doubled by "Crafty." I choose to return the 3 Skulls tainting the Three Rivers.

Middle of Turn: I decide to Battle the Brigand in the Emerald Expanse. I go in armed with  2 Humanoid Advantages, an additional + 2 Wild Advantages (thanks to Miras's Grasslands connection) and a Wild via a Potion, so 5 in total. I manage to defeat them, at the expense of 2 Warriors and the Potion as well! This scrap earns me 2 Spirit! After getting a free Longsword from my Reinforce Action in the Bazaar, I use the "Smugglers Coin" to flush the market and,by some miracle, turn up both "Azkol’s Idol" and also the "Horn of Azkol"!!! I then spend 1 Spirit to take a red-eye Air Carpet flight to the Dayside Bazaar. 

Skull drop: it pops out in the West and I place it on the Hissing Grounds Citadel. A Banner Glyph is revealed in the East and rumors start to swirl about a fireball from the Tower headed for a Bazaar! To make matters worse, a Titan rises out of the Weeping Waters!


Turn 12

Start of Turn: I pick up a random "Dragon Teeth" Potion!

Middle of Turn: After spending 1 Spirit to Reinforce in the Bazaar, I gain "Azkol’s Horn." Then, after paying another Spirit to Carpet off to the Titan’s space, I spend 4 Spirit to remove the dirty big bastid from the game by smoking it right in the noggin' with my "Golden Mace." I then Move 3 to the Howling Desert, where I perform a Cleanse action to remove the 2 Skulls there. This gives me 2 Spirit back and now I'm back up to 4. 

I drop a Skull but it mercifully produces no Events!

Turn 13

Start of Turn: I Gain another "Dragonteeth" Potion and spend both of them for 12 Warriors! 

Middle of Turn: I invest 5 Spirit at the Citadel to Unlock my “Inventive” Virtue via a Reinforce Action. I then use 1 Spirit to fly to Greenbridge and take on the Brigands there, armed with 4 possible Advantages. After defeating them and gaining 2 Spirit for this Heroic Action, I Move to the Dayside Bazaar.

Skull drop: 2 Skulls pop out in the East, which I add to the Village and the Bazaar. Another one is dropped in the Southern Citadel and a Seal on the Tower’s North side is removed! Miras goads 1 Brigand into Greenbride and the other into the Forest of Shades. Then the Brigands strike and I'm forced to lose 1 item, so I turf the "Smuggler’s Coin" since all of the Treasures I need are already in the Market! 

Turn 14

Start of Turn: My Banner Action gives me a free "Siren’s Song" Potion. 

Middle of Turn: I spend 1 Spirit to Reinforce in the Bazaar and gain "Azkol’s Doll." 

I now have all of the Treasures and Virtues I need, so I Move 2 spaces to the Radiant Mountains to complete the "Azkol’s Treasures" Quest! Ashstrider then emerges from the Tower, appearing in the Weeping Waters, and I collect 2 Spirit for this Heroic Action. 


Turn 15

Start of Turn: I gain a free "Purifying Breath" Potion and blow it immediately to remove 2 Skulls from the Emerald Expanse.

Middle of Turn: I also spend a "Dragonteeth" Potion to gather up 6 more Warriors and a "Golden Sun" Potion for another Spirit. I then drop 1 Spirit to double-Move 5 spaces to Anza Village, where I spend 1 more Spirit to recruit 12 Warriors via a Reinforce Action. I then use my very last move to wade into the Weeping Waters and confront Ashstrider! 

The resulting skirmish is intense. The first combat card forces me to lose 18 warriors per adjacent Skull...but I've been doing a good job tamping them down so there's only 1 nearby! I decide to spend my Crown to generate 3 Wild Advantages (thanks to Zaida's special ability) and then spend 1 to reduce my cost to 12 Warriors per Skull, which I pay! The next card is lose 12 Warriors per Skull, so I pay the cost again! But the next card is a real doozy: lose 30 Warriors (!), 1 Gear and 1 Treasure. I spend an Advantage to Reduce this to 20 and 1 Gear, so I lose my remaining Warriors as well as the Sword and then take a Corruption. The next card requires me to lose 25 Warriors and 3 Spirit, so I spend my remaining Advantages and reduce it to a loss of just 5 Warriors, but since I don't have that, I take another Corruption and then Retreat! Bloodied but unbowed, Ashstrider moves off to the Broken Lands! 

In the resulting Skull drop, three Skulls pour out into the East, a Titan appears in Azkol’s Bane in the South and an Ice Troll emerges in the Radiant Mountains. 

Turn 16

Start of Turn: I draw a "Fortune’s Favor" Potion. 

Middle of Turn: I Move 1 space to the Hissing Groves Citadel to remove a single Skull with a Cleanse and gain 2 Spirit. I then get a free "Golden Sun" Potion via my Reinforce Action there. Finally, I use the rest of my Move to travel 2 more spaces to the Akartus Citadel.

A Skull rolls out in the South, which I add to the Emerald Expanse. The Month ends and new quests appear, namely Vasa in the Ash Hills and the Smuggler’s Den Dungeon in Dayside. 

Turn 17

Start of Turn:  I pick up a new "Golden Sun" Potion.

Middle of Turn: I spends 5 Spirit to remove my two Corruptions. Then, after spending the "Golden Sun" Potions to gain 2 Spirit, I Move 3 spaces to tackle Ashstrider again! 

The first combat card requires me to lose 12 Warriors per adjacent Skull...but there are none! The next card requires me to lose 20 Warriors and 1 Gear., leading to my first Corruption of the battle! The next one is even worse, requiring the loss of 25 Warriors and 3 Spirit. After taking the Spirit hit, I have to accept another Corruption! The next card is clearly one that I reduced in the previous skirmish: Lose 5 Warriors. So, I spend a Beast Advantage to reduce it and incur no losses! The last card is a scary Critical Hit...requiring me to place a Skull in every Building in my current Kingdom. But since there are none, I can clear this card with zero issues! 

Victory!!!

***

REVIEW

PROS

  • The strategy starts even before the game begins, since you can choose you foes based on the collective Advantages of your Character group. 
  • Turns are clearly delineated and they fly by very quickly. Execute your Banner Action, then do Moves, Heroic Actions (Battle, Cleanse or Quest) and perform Building-specific Reinforce Actions in any order. I also like how you can split up your Movement to make for a very productive turn.
  • Throwing Skulls into the Tower to end your turn is insanely gratifying. 
  • Between the app and the unpredictable antics of the Tower, the game experience is really immersive.
  • This is truly a co-operative game. Juggling priorities RE: foes on the board, end game goals and various Quests is critically important. You can't all dogpile the main Adversary as soon as it appears because ignoring other elements on the board might case them to spiral out of control really fast.   
  • The Character "classes" are all pretty distinct from one another.
  • As evidenced by the photos, this is clearly one of the best productions in the history of the hobby. The Tower, cards, Character sheets and the board are all top notch, but the "Dark Hordes" expansion really ramps up the game's curb appeal by adding the amazing foe minis seen pictured here.
  • I'm going to be playing this game a lot. Even though there's no shortage of options in the core game RE: Characters, Foes, Adversaries, "gritty" difficulty settings and competitive mode, the "Alliances" expansion adds even more content. This is "desert island" game territory, folks.
  • It's challenging. I won this solo run after two prior failures, the first being a 3-player game and the second being a 4-player game. I won this time out because I picked the optimal Character and tried not to waste a single action. I.E. I won because I learned from the mistakes of the two previous matches. Having said that, I imagine more players = greater difficulty. 
CONS

  • The app and the Tower might be great for ambiance and moving the game along, but I think there's definitely a learning curve when it comes to integrating all of these unusual assets together. Only after this third game did I have a real handle on how it all worked properly in tandem.
  • The Tower takes 3 AA batteries, so you might find yourself running out of juice mid-game. The app will certainly pause while you swap out your batteries, but the first time I had to deal with it, it was a giant pain in the knutz with Skulls popping out everywhere. I really wish there was an onboard battery and you could just charge the damn thing by just plugging it in. Of course, that might have driven up the cost even more, limited the life expectancy of the Tower and eventually turned it into a very odd-looking accent piece for your coffee table.    
  • Because this game is so unusual, and the rule book is criminally brief, rules minutia questions abound. Normally this would piss me off, but the experience of playing the game is so friggin' immersive that I'm willing to put in the ground work. In light of this, check out my handy-dandy bonus FAQ / Rules Clarification summary at the end of this post.      
  • I was lucky, 'cuz I got this sucker on a deep discount...and at the Kickstarter price. As for anyone else, I highly suggest that you have a mitt-full of nitroglycerin pills handy before you even so much as glance at the price tag. 
***

There's nothing in my game library right now that even vaguely approximates the experience of playing Return to Dark Tower. I think its a must-have for fantasy adventure game nerds, fans of the original title and folks who appreciate truly immersive and team-based gameplay.

But it ain't perfect. It took three dry runs and a thorough FAQ scouring to tease out all of the game's vagaries. For a lot of games, all of that effort really isn't worth the bother. But in the case of something truly special like Return to Dark Tower, the extra work will yield dividends and result in countless memorable tabletop experiences for you and your fellow adventurers. 

The game rates 5 pips out of 6 with a decent tilt up to the highest point on yon ominous ebon spyre.


BONUS!
Return to Dark Tower - Collected FAQ / Rules Clarifications
Version 1.2

Quests

• For the “Find Azkol’s Treasures” Quest, only one player can take the Quest Action to complete the main goal, so they need to meet all the requirements, I.E. possess all of the Treasures and have 5 Virtues. This includes your starting 3.

• Trees. During the mission where you must move Trees, sometimes enemies burn them down. Once they are burned they move to the nearest Forest, but what if the nearest space is the one they were already on? Do they need to move to a different space altogether? 

No, just keep them on the space that they're on.

Heroes

Brutal Warlord

• When the Brutal Warlord reinforces at a Citadel, and gains the "Inspiring" Virtue, can the player use the Virtue on that turn? 

Yes. Anything that has an "after you Reinforce" effect triggers the turn you get it by Reinforcing.

The Spymaster

• The Spymaster's "Fortunate" Virtue lets you Reinforce twice per turn at the same Building. Does that count as 2 separate uses of the Reinforce Action, or is it still just 1 Action, but I get to resolve the effect twice? 

It’s considered to be two separate Reinforce actions.

Potions

• If you’re forced to discard Potions can you use them first? 

Yes, you can spend something before you would have to lose it, but only if it's currently your turn and not during Event resolution.

• Can Potions be used at the “end of turn”? 

No. Once you’ve dropped a Skull into the Tower, you can’t use Items anymore on that turn, even to deal with Skulls or Events.

• Do Adversaries count as "Foes" for the purposes of the Potions that let you move Foes around? What about the Treasure that lets you spend Spirit equal to the level of the Foe to remove it? 

"Yes," to moving them via Potions but "No" to that particular effect since Adversaries can only be defeated by Battling them.

Specific Items

Lamp of Hope

• Do you have to be on a space with Skulls to use the "Lamp of Hope"? 

You can use the Lamp in any space, even one without a Building. To be more technical, you can take the Cleanse action as if you were on any space.

Oakstone Bow

• Can you use the Oakstone Bow on an Adversary at a distance? 

Yes. Adversaries are considered to be Foes and you get the terrain Advantage from the adjacent space that you're attacking from.

• Can you combine the Bow’s effect with the Companion Hakon? 

If you're on a space with a Building, you'd get the Companion's Advantages too. Just like with the terrain Advantages, if the Foe is on Advantageous space but you're using the Bow on an adjacent space you won't get those particular Advantages.

Lamp of Darkness

• Can you use the Lamp to remove a foe from the board mid-battle? 

No.

Adversaries

• How do Retreats work in Adversary battles? 

The Adversary battles works the same way as any other battle against a Foe. Their deck is shuffled, you draw cards equal to their level and then you try to resolve those cards. The only difference with the Adversary is that you can retreat after resolving a card and any Advantages you applied to a particular card remain, i.e., if you upgrade a card, it stays upgraded. Note that the Adversary’s cards start at "Lethal" level. If you apply Advantages to a card, they are tracked by the decrementing dots. So, when you draw a Battle Card in a future battle, you can immediately tell the card’s level and whether or not it was improved just by looking at the dots.

Companions

• Can you have multiple Companions? 

Yes.

Specific Companions

Zaida

• Are you able to use Zaida the Efreet ability to spend 1 Treasure to gain +3 Wild Advantages in the middle of a Battle, or in the middle of a card? 

Yes. You can actually do it in response to a card because you don't resolve the card until after you are done upgrading it. So, if you had a Battle Card that said "Lose 1 Treasure", you could spend a Treasure to gain 3 Wild Advantages and then spend those to upgrade that card. In fact, that's a great strategy since you're going to be forced to discard the Treasure anyway. By using Zaida's ability to get 3 Advantages for it, you can upgrade that card and potentially gain something if you fully upgrade it.

Grigor and Yana

• When I best them, do I then gain them as Companions? 

Yes.

Yana

• Does Yana’s ability mean that you never lose more than one Corruption over the course of an entire Battle, regardless of how many cards you can't fulfill? I.E. you can't gain more than one Corruption? 

Correct. Take note that this ability only applies to level 2, 3 or 4 Foes.

Isa

• Isa offered us a deal where one of the choices was to “collectively” lose Warriors. What happens if we don’t have enough Warriors altogether? 

Players lose all of their available Warriors, and then each player who couldn't satisfy the entire requirement gains a Corruption. Note that this is a rare special occasion which involves “collective” losses.

Dungeons

• Can you use your Kingdom Virtue in a Dungeon if it's on your terrain type? 

Yes.

• You can spend only 1 Advantage per Dungeon room and terrain Advantages apply as per the keyword on the Dungeon tile.

• Dungeon rooms do not count as Battle Cards for the purpose of Gear effects, etc. I.E. you can’t use Leather Armour to reduce Hero loss in a dungeon, only against your Foe's Battle Cards.

• In the dungeon exploration example on page 9 of the rulebook, it shows you losing your Longsword in the first room, but then using its Advantage in the second room. Is this a typo, or am I missing something? 

You always calculate your Advantages before taking your Heroic Action. If you spend or lose the source of an Advantage in the middle of an Action, the Advantage still applies until the end of the Action. In fact, some game effects allow you to gain more Advantages in the middle of a Heroic Action. You can spend up to 10 Advantages during a Heroic Action.

Heroic Actions

Cleanse

• You can only Cleanse in a space with Skulls.

Moving

• What happens if a Hero's base Move changes, say by gaining or losing their "Trusted Maps" partway through their Move? 

This effect does not apply until your next turn.

Advantages

• What's the difference between Spending Advantages and Spending Items? 

When you spend an Advantage, you don't return the Item that created it. For example, if you have a Quest which requires you to spend 4 Magic Advantages, you just need the Advantages when you perform the Quest Heroic Action. If the source of the Advantage requires you to spend the Item to receive the advantage, then return that item back to its appropriate place. If the Advantage is automatic (indicated by a black arrow on cards), you don't need to spend (or discard) the source of the Advantage in order to get it. Another example: if a Companion grants +2 Wild Advantages while in the Hills, and the Quest is in a Hills space, you automatically have those 2 Advantages to apply to the Quest's requirements. Example #3: if a Treasure card says: "Spend to gain +4 Magic Advantages", and you need those Magic Advantages to complete your current Quest, you can spend (I.E. discard) that Treasure to gain those 4 Magic Advantages.

Foes, Adversaries and Battling

• Even if you don’t have enough of a resource, remember to remove as much of that resource as you can. For example: if a card requires 1 Potion and 15 Warriors and you have a Potion and 12 Warriors, remove the Potion and the 12 Warriors and then take a single  Corruption. Please note that you can only gain one Corruption per failed card. 

• Adversaries can’t be removed with a “Remove a Foe” effect. They can only be defeated in Battle. 

• When Moving monsters do you have to move them towards buildings? 

No, it's the player's choice.

• If a Battle Card gives me an Item that provides an Advantage that I can used against that type of Foe, can I use it in the current battle? 

Yes. You can use Advantages you gain during a battle in that battle.

• If a Battle Card causes me to lose an Item that gave me an Advantage against that current foe, can I still use that Advantage in the current battle? 

Yes. You calculate your Advantages when you take the Heroic Action. If you lose the source of an Advantage, you do not lose the Advantage and can still spend it on a subsequent Battle Card in that Battle.

Specific Foes

Dragons

• "The Dragon Strike!" Event says "lose a Treasure if the Dragon is in your Kingdom." It should read: "Each Hero with a Dragon in their current Kingdom loses a Treasure."

Shadow Wolves 

• How do I resolve their “Strike”? 

If a Shadow Wolf is adjacent to a space with a hero, the Wolf moves to that space. Then, each Hero loses 3 Warriors for each Shadow Wolf on their space. If there were no Shadow Wolves on or adjacent to a Hero then no Wolves are moved and nothing happens.

Corruption

• Can I gain a Corruption from an effect that does not make me lose Items or resources? For example, if an Event requires me to place 2 Skulls on a particular Building and that Building is destroyed, do I gain a Corruption? What happens to the Skulls? 

The two most common ways you gain a Corruption are : when a Battle Card, Dungeon room, Event, or other game effect causes you to lose things that you don’t have or when a Building is destroyed by the placement of a fourth Skull. You cannot gain more than 1 Corruption from a single Battle Card, Dungeon room, or Event. Take as many losses or place as many Skulls as you can, and then take a Corruption. Any Skulls you cannot place are removed from the game. You gain a Corruption each time a Building in your Home Kingdom is destroyed. So, in the example above, you would gain a Corruption because you needed to place Skulls on a destroyed Building. Even though there were 2 Skulls to place you only gain one Corruption and they're removed from the game.

• You gain a Corruption when you cannot fully resolve an Event, Battle Card, or Dungeon room. Some effects affect multiple players. Each player who can't fully resolve it resolves as much as they can and gains a Corruption.

• During a Battle with a Foe, I gained a Corruption card that limits you to spending 4 Advantages per turn. Would this take place immediately? 

Yes. If you've already spent 4 or more Advantages, you can't spend any more for the rest of that turn, including the rest of a Battle that you're already in. It's true that you don't lose Advantages you've already generated, but this Corruption limits how many you can spend.  

Virtues

• When you are instructed to lose a Virtue, does that mean remove one from the game or flip an active Virtue tile to its inactive side? 

You have to select either your Champion Virtue, or one Character Virtue that you've already unlocked, and remove it from the game.

Seals

• When the app tells me to remove a Seal on the Tower, how do I know which Seal to remove? 

The Tower will do a brief light animation and then a set of lights will stay lit. The two lights on the edge of the Tower show you which face of the Tower the Seal is on. Then, look to see which specific Seal is lit up from behind to know which one to remove. The lights on the edge are near the bottom Seal, but that might not be the specific Seal to remove. The Seal light might be harder to see if your room is very brightly lit or you're looking at the Tower from a higher angle.

• The rules state that you suffer the penalty of the Seal if it’s facing you, but sometimes it's lit up and other times it's not. Does the penalty still apply if it's not lit? 

The lighting is not relevant to the rule but merely for show (and to make them easier to see). That said, revealed Glyphs should be lit. Make sure you’re removing the correct Seal when that Event pops up. Also note that the -1 Spirit Seal penalty is specific to the player seated facing it and location of that player's Character on the board is irrelevant. 

Skulls, Building and Events

• What if there are no Buildings to place Skulls on when they come out of the Tower? 

If a non-active player has no Buildings in their Kingdom already, and Skulls come out in their Kingdom, then the active player (the one who drops the Skulls) gets a single Corruption and all the Skulls are removed from the game. The non-active player will only get a Corruption for each Building destroyed in their Kingdom. If there are no Buildings, then no Corruption for the non-active player.

• You can resolve Skull placements in any order you choose.

• If a structure is destroyed in a Dormant Kingdom after a fourth Skull was placed on it, no one gets a Corruption. But what happens to the fourth Skull? 

The structure and the three Skulls on it are removed from the game and the fourth Skull gets put back into inventory.

• You end your turn with a Skull drop into the Tower and an Event triggers. Who does the event apply to? You or the next player? 

The player who dropped the Skull into the Tower makes any required choices.

• Events are the last part of a player's turn, i.e., the player who just went.

• Does an effect that places a Skull "in every building in the Kingdom" result in Corruption if one or more Buildings in that Kingdom are already destroyed? 

These effects now say "4 Buildings" instead of "each Building". So, under the Corruption rules as clarified, you would get a Corruption because you would be required to place a Skull on a destroyed Building. Remove that Skull from the game and take a Corruption.

Haggle Die

• Glyph Cost: You pay for the Glyph when you decide to take the Reinforce action. Then you can roll the Haggle Die. If it's cancelled, you still lose that Spirit. You do not need to pay for the upgraded Reinforce if it's cancelled.

End of Game

• The game ends only when a player can’t throw a Skull in the Tower at the end of a turn, not when the supply runs out!

Saturday, January 29, 2022

The Story for Far - Part 14 - "Accidental Allies"

"The Story So Far" is an ongoing series recapping the details of a Dungeons & Dragons campaign that I've been running since 2002. Links to the previous entries can be found here:  

Prologue                    Part 1                    Part 2                    Part 3              Part 4  

Part 5                        Part 6                    Part 7                    Part 8              Part 9 

Part 10                     Part 11                  Part 12                   Part 13       

I've "fictionalized" the session reports in a likely-vain attempt to make them more "entertaining."   

And now, our story continues...

Earthday, Earthlife 1st, 1492-supplemental

As the Fellowship made their way through town, they got to know their guide a little bit.

Kirbin Thornn
played by Mark

Race: Human
Class: Ranger
Height: 5'10'
Weight: 185 lbs
Eyes: Brown
Hair: Brown


"So, Kerbin," Lorelei began, her voice leaden with equal parts hangover and suspicion. "What exactly do you do at this camp?"

"Whatever needs doing," the ranger replied, his furtive eyes appraising every passer-by for a hint of threat. "Mostly I'm a chopper, cutting roads to new clearing sites, but lately I've had my hands full defending the camp from orcs...and trying to deal with all of these accidents."

"Has it always been that way?" Pol inquired.

Kerbin stifled a chuckle before responding to the warrior.

"Well, I'd be lying if I said that the boys weren't naturally rough and accident-prone. But lately it's been terrible, with three or four mishaps a day. If it keeps up, we won't have anyone healthy enough to work."

"When did this start?" Roman pursued, nimbly dancing out of the way of a matronly old woman carrying a brace of rabbits.

"A week or two, I suppose." the ranger replied, distracted by their sudden diversion away from the market. "Where are we headed, by the way?"

"The abbey," Roman replied. "I need to check on someone before we leave."

As the group entered the infirmary, they were taken aback to see Elster speaking to another dwarf. At first glance, they thought that Giran Oakenshield had experienced a miraculous overnight recovery and was now up and about. But, upon closer inspection, the adventures saw that the lord of Kiras Toth was still lying in state and this new dwarf had a conspicuously-absent facial feature.  

Korrick the Beardless
played by Matt

Race: Hill Dwarf
Class: Paladin
Age: 42 
Height: 4'4"
Weight: 210 lbs
Eyes: Brown
Hair: Black
  

Elster looked surprised and relieved when his allies appeared in the doorway. This was replaced by mild panic as the Fellowship instinctively started to back away, assuming that they'd interrupted something. Seeing this, Elster frantically gestured for them to come in and, when they hesitated for a second, he rushed over and physically ushered them into the room, as if desperate for reinforcements. 

"Good day, my dear friends!" he entreated. "Come in, come in...you simply must meet this fascinating young man. I'd like to introduce Ser Korrick of Deepdelve!"

The adventurers slowly coalesced around the wide-eyed stranger, shaking his hand and exchanging names when prompted.

"So, what brings you here, Korrick?" Roman asked.

The dwarf suddenly looked like he'd been caught in a bullseye lantern while trying to a filch an apple. He looked sheepish and stammered for a bit before answering. 

"Well, my master, Father Aeolyn, gave me a quest to go away from him and check up on things down south. But, when I got there, I saw that everything was all wrecked. So, after about a day or so, the guards gave me a new quest...to leave where they were and come here to check up on Mister Oakeyshield. So here I am!"

In the resulting gulf of awkward silence that followed, the Fellowship exchanged quizzical looks. Elster chuckled awkwardly. 

"Well, that's quite the noble quest," the dwarven cleric said. "Aaaand, now that you've completed it, perhaps you should go back to Kiras Toth and update everyone there on his condition."

"Or," Roman said. "You could come with us. We've got a new quest and you're welcome to come along..."

All too late, Roman noticed that Elster had melted into the background and was desperately miming what appeared to be a stark warning. 

"...that is, if you're, um,  interested." 

Upon hearing this, Korrick's eyes got as big as saucers and he exchanged excited looks with all of his new friends. When the new arrival happened to glance backin Elster's direction, the dwarven cleric's facial expression instantly flipped from vague horror to a nailed-on smile, followed by a spontaneous thumbs-up.

When Korrick looked back to the group, Roman actually felt the flurry of daggers that  Elster launched from his eyes.  
           
***

Roman watched intently as Elster puttered about his temporary quarters, preparing himself for departure.

"I'm sorry," the priest lamented. "I just though he could be of help."

The dwarf gave a world-weary sigh as he shoved a tinderbox into his backpack.

"I should be the one apologizing, lad," Elster said. "I only spent a few hours with the boy this morning, so I shouldn't be so quick to judge him." 

Roman scuffed the toe of his boot on the flagstone floor.

"Do you trust him?"

Elster spluttered in reaction to this question.

"Moradin's Beard, Roman!" he said, throwing his hands up in the air. "You were there! You met him!  What do you think?"

The dwarf pointed vaguely towards at a multi-pouch belt hanging from a clothing rack in the corner of the room. Getting the signal, Roman retrieved and delivered it to his friend as Elster kicked off his sandals and dug his adventuring boots out from underneath his cot.

"I'd say that he's as transparent as an Unseen Servant."

"Precisely!" Elster replied. "He's just young and green...and he's got a tongue on him like a clapper on a cow-bell. He never shuts up! Told me his entire life story this morning. Apparently he comes from a long line of talented masons in Deepdelve but he failed his apprenticeship and was effectively exiled from the city. Eventually he fell in with some transient human hermit and became a devotee of Heironeous, of all things."

Roman chuckled as he helped Elster into his chainmail tunic.

"He must be confused," the priest said. "No human being has ever traveled that far north. He probably mistook this Aeolyn character for a really tall dwarf."    

"I can only tell you what he told me," Elster returned, donning his tabard of silver and earthen hues. "Sounds like his mentor was a bit of an ass to him. If I didn't know any better, I'd say that he sent the boy out here all alone on a quest just to get rid of him."  

Roman's whistle was cut short by a grunt as he tried to heft his friend's backpack up and nearly bowled over from the weight.

"Wow, that's pretty cold. What do you have in here, gold bullion?"

"Poor lad didn't fare much better at Kiras Toth. He actually told me that the guards 'liked him so much there that they gave him a nickname'."

"Oh, no," Roman winced. "What was it?"

"Ore-for-brains," Elster said with a sour expression. "Sure, the lad might be a bit dim, but that's just plain cruel."

Roman clucked his disapproval and handed Elster his shield, emblazoned with the sigil of a hammer and anvil.

"So, do you really think you can find this unicorn?" the dwarf quizzed. "And, more importantly, do you think it can actually help Giran?" 

Roman scrubbed his jaw with the palm of his hand, alarmed by the amount of stubble on his face. When was the last time he had a moment to himself, let alone to shave?

"Well, if you believe this ranger, the creature might as well be the camp's mascot. And I've seen the healing power of the unicorn first hand."

"Well, that's good enough for me," Elster pronounced, patting his ally's arm as he clinked and clanked towards the door. 

As they passed by a familiar cell, Roman was suddenly reminded of something. 

"Hold up, I'd better check in with Moira. Something seemed to be bothering her the last time we spoke..."

"Good luck finding her," Elster replied. "I haven't seen hide nor hair of her. For all intents and purposes, Regis seems to be running the show here right now."

Troubled to hear this, Roman made a silent vow to sit down with Moira upon his return and extract the truth from her. Like an abscessed tooth, if need be.

With a shared look of resolve, the pair left the abbey and headed off to the shopping quarter to find their allies.

***

"Wait, how much did you say it was?" Lorelei asked.

"Two thousand crowns!" Bria raged, kicking a rock out of her path. It clipped a fern and disappeared into the lush undergrowth.

"That's pretty steep." Pol observed, looking over Kerbin's shoulder to keep a sharp eye on the trail ahead.

"Right?!?" the thief replied. "What really galls me is that it would be at least half that price in Footholde, but Salim says it's because it costs so much to ship it to Castebridge. Blah...blah...blah...I mean, twelve-hundred, maybe, but double the price? That's highway robbery!" 

"Hmmm," Lorelei sneered, taking in a deep lungful of air in an effort to offset her lingering headache. "I would have thought that you, of all people, would appreciate a bit of 'highway robbery'."  
    
Bria glared at before before resuming her rant.

"So, I tells him, how about five-hundred? And then he just freaks out...ranting and raving about how I don't understand, how I'm trying to ruin him financially and make his kids go hungry and blind. I asked him to be reasonable but he just started waving his hands in front of my face and saying 'No! No! I'm done with you...you talk to my wife!' and then he just walked away!"

"And that's when she got the broom out, huh?" Roman asked.

"Yup," Bria said, picking up and throwing another pebble, this time at a nearby tree. "Barely got out of there with my life."

"So what are you going to do now?" Pol quizzed. 

Upon hearing this, Bria merrily skipped over to the fighter, as if everything she'd been saying up to that point was an elaborate set up for what she did next. Pol half-watched as the thief started counting off her digits as she unfurled them one at a time from a tight fist.

"Five finger discount," she announced proudly, holding up and waving her open hand.

All of a sudden, Korrick stopped walking, plugged his ears with two chubby fingers and started singing at the top of his cracking voice. Everyone turned and stared at him, wondering if their new foundling was having some sort of mental breakdown. As soon as all eyes were upon him, the beardless dwarf stopped his caterwauling and tentatively spoke up.  

"I'm sorry, Miss Bria," Korrick said, his face looking dire. "But it's not very nice to steal from people. If you do that, Mister Salim's kids really would go hungry."

The thief blinked at the dwarf as if he were speaking in some foreign language.

"Um, yeah," she said, dismissing Korrick's intense gaze with the wave of her hand, which she now looked at awkwardly. "I mean, I was, um...I was just kidding."

After sharing a hushed conversation with a clearly-irritated ranger, Roman cleared his throat and gestured for the Fellowship to resume walking.

"Sorry, but can we just pick up the pace a little bit here?" he asked. "Between all of the dawdling and yodeling, it's a minor miracle that we haven't been set upon by orcs...or something worse. Come on, Kerbin tells me that the camp is just around the next bend."

"Thank Khalreshaar," Lorelei proclaimed, casting her eyes skyward to the canopy of trees overhead. 

As they resumed their march, Korrick sidled over to Roman and Pol.    

"Notwithstanding the obvious impact on the wronged merchant, the concept of theft being a victimless crime is actually a myth since shop-keeps are often forced to increase their mean prices in order to compensate for such attrition." 

With this critical footnote now delivered, the young dwarf double-timed his pace in order to catch up to Elster.   

"He's a special one," Pol observed. 

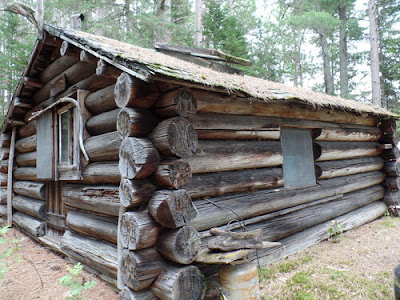
Roman nodded aggressively as Kerbin led them around the bend. All at once, the group found themselves strolling towards a cluster of six building. As they drew closer, they could see that every structure was constructed from large, stacked timber logs sealed together by some sort of crude mortar. Thick boards made up the roofs and and gable ends. 


"Let me give you a quick tour," Kerbin said, pointing to each structure in turn. "That small one in the middle there belongs to Beren, the foreman. He lives there with his wife, Wilhemina. That other small hut is the van, or general store. It's run by Vestine, the camp's medic. She's the one who's partnered up with the unicorn."

The ranger paused before showcasing the larger buildings.

"That long house is the men's camp, where everyone sleeps. And, if you're wondering where all of those tantalizing smells are coming from, that would be the cook camp, over there. Likely that's where everyone is at this late hour."

Pol's stomach growled audibly and Lorelei hoped that her mild nausea might actually be a sign of hunger.   

"Finally, over there you'll see the smithy, run by Denn. And, that's the barn, obviously."

The collective eyes of the Fellowship fell upon a large message painted on the latter structure's proverbial broadside. It read:

4 Days Hours Since Our Last Accident

Just seconds after digesting this, a ramshackle cart driven by a lone teamster suddenly whipped into view, blazing towards the cook house. 

"Oi!" yelled the driver. "You falking bastiges bedder not 'ave eat all the beans on me!"

Without warning, the hub rivets suddenly popped out of the flange on the right wheel of the cart, sending it skipping off towards the cook house. With the horses still in full gallop, the cart immediately twisted, launching the lumberjack face-first into the dirt as the rogue wheel careened through the front door of the cookhouse like it was made out of paper.

Roman, Elster and Korrick immediately ran over to the teamster laying face down in the dirt and managed to stabilize him, although they could do precious little for his missing orthodontics. As the dust settled, the camp's inhabitants slowly began to filter out of the shattered cookhouse door, brandishing cutlery and faces heavy with resignation. 

Instead of looking shocked by either the carnage around them or the presence of strangers in their camp, the lumberjacks just stood around and sighed. Eventually one of them, whom the adventurers recognized as Beren, shuffled warily over to the barn, went inside, emerged with a paint can and brush and then proceeded to make an addendum to the message on the clapboard. 

4 Days Hours Minutes Since Our Last Accident  

Next up: the adventurers try to solve the mystery of the camp's misfortunes and attempt to find the unicorn before time runs out!

***

IMAGE CREDITS